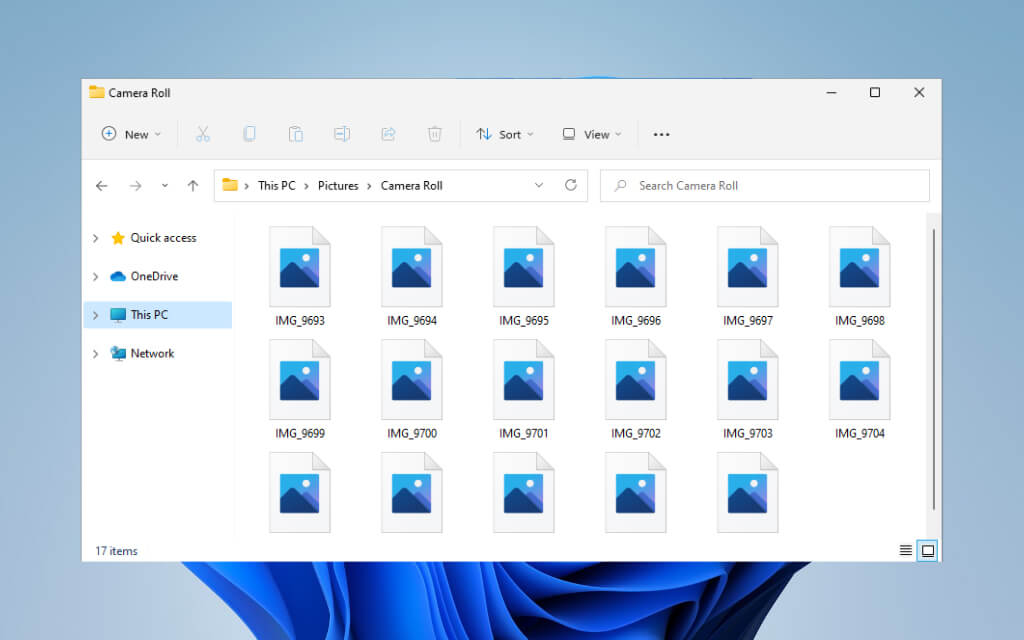
In most cases, you’ll see blank thumbnails due to incorrectly configured File Explorer settings (called Windows Explorer earlier) or a corrupt thumbnail cache. But rarely, you could be dealing with something as severe as a malware infestation. Work through the fixes below to get all thumbnails showing in Windows 11 and 10 as soon as possible. Note: By design, Windows 11 cannot display thumbnail previews for folders. Hence, the following fixes only impact file previews in Microsoft’s newest operating system.
Check Folder View Options
Your first course of action is to check if Windows 11 or Windows 10 is set up to display thumbnail previews in File Explorer. You can do that via the File Explorer Options dialog.
- Select the Search icon or box on the taskbar and type file explorer options.
- Select Open.
- Switch to the View tab.
- Uncheck the box next to Always show icons, never thumbnails.
- Select Apply, then OK. If you had to activate the option in step 4, File Explorer should generate thumbnails immediately. If you didn’t have to do anything, move on with the rest of the fixes.
Force-Restart File Explorer
File Explorer can also bug out for no reason and stop functioning correctly. The quickest way to fix that is to restart it using the Task Manager.
- Press Shift + Ctrl + Esc to open the Task Manager.
- Select More details (if needed) to expand the default Task Manager view.
- Under the Processes tab, locate and select Windows Explorer.
- Select the Restart button to restart File Explorer.
- Exit the Task Manager. If image or video files (and folders in Windows 10) still appear blank, try restarting the operating system instead.
Delete Thumbnail Cache
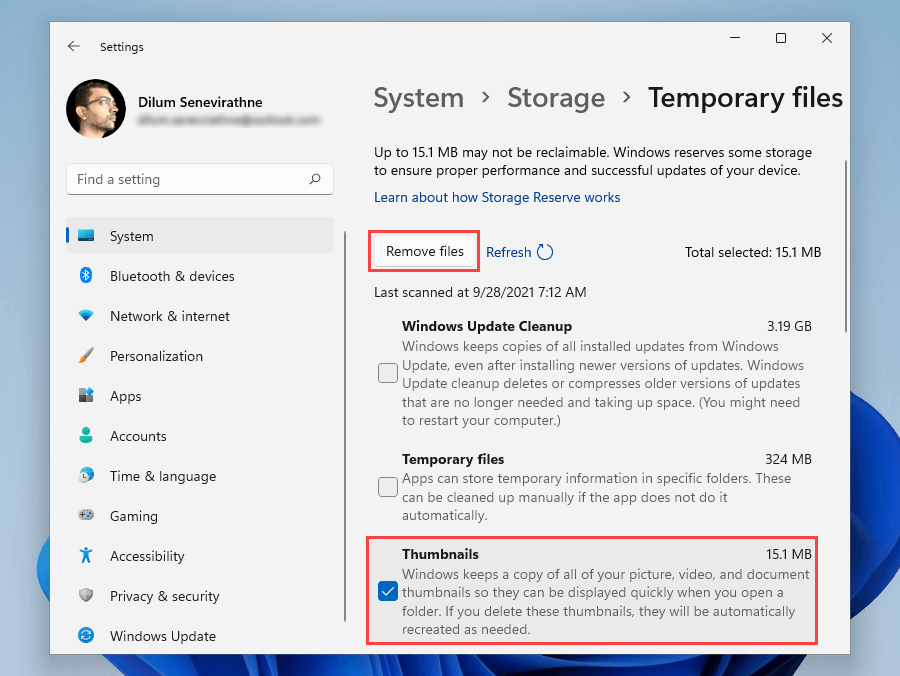
If the thumbnails are still not showing, the chances are you’re dealing with a corrupt thumbnail cache. Deleting it helps File Explorer regenerate previews from scratch.
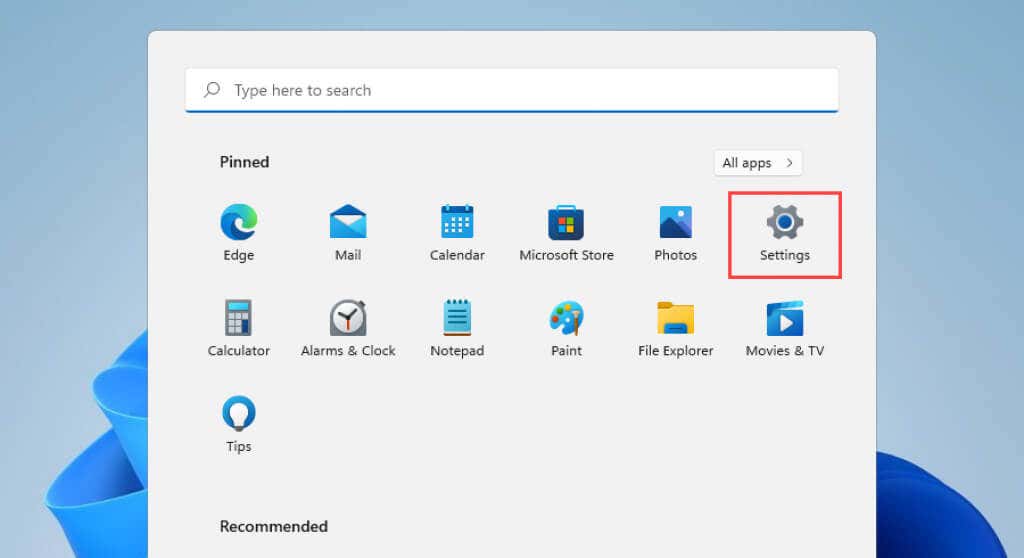
- Open the Start menu and select Settings.
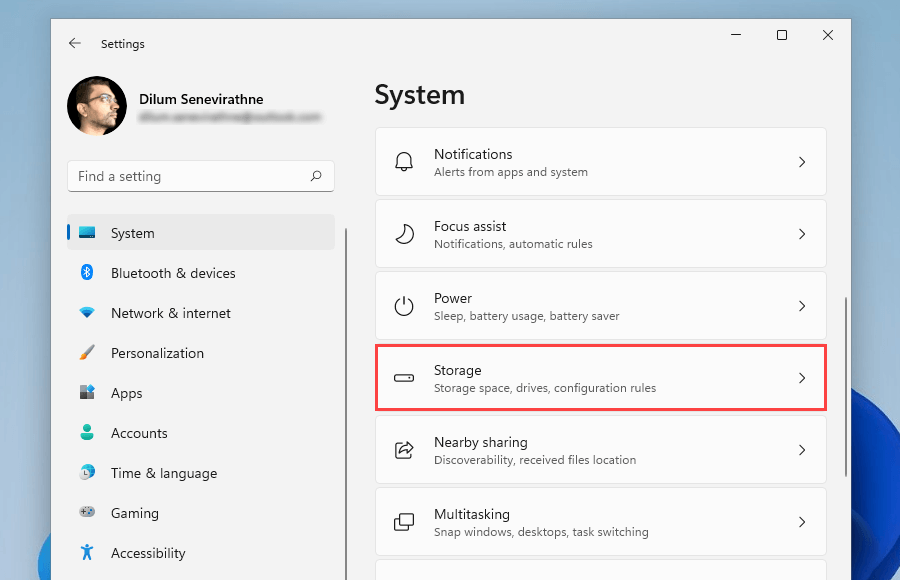
- Select System > Storage.
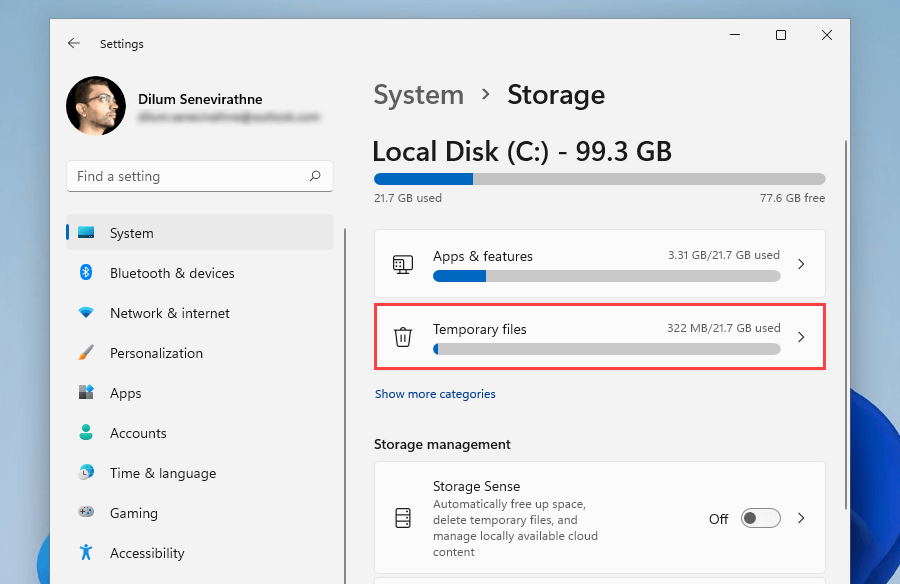
- Select Temporary Files.
- Check the box next to Thumbnails and select Remove files.
- Restart your computer.
Delete Thumbnail Cache (Alternate Method)
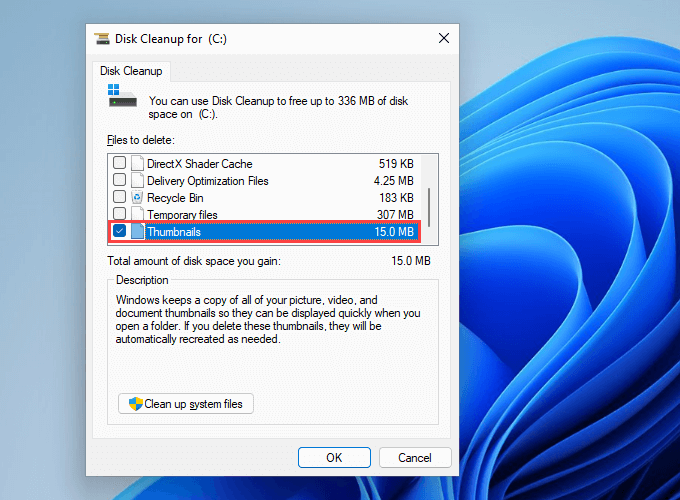
If you have trouble deleting the thumbnail cache via the Storage Settings in Windows 11 or Windows 10, try this alternative method involving the legacy Disk Cleanup app instead.
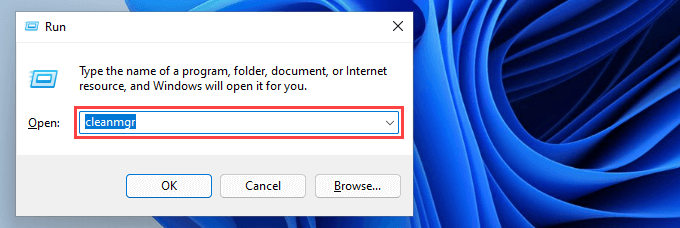
- Press Windows + R to open the Run box.
- Type cleanmgr and select OK.
- Check the box next to Thumbnails.
- Select OK.
Restore File Explorer Defaults
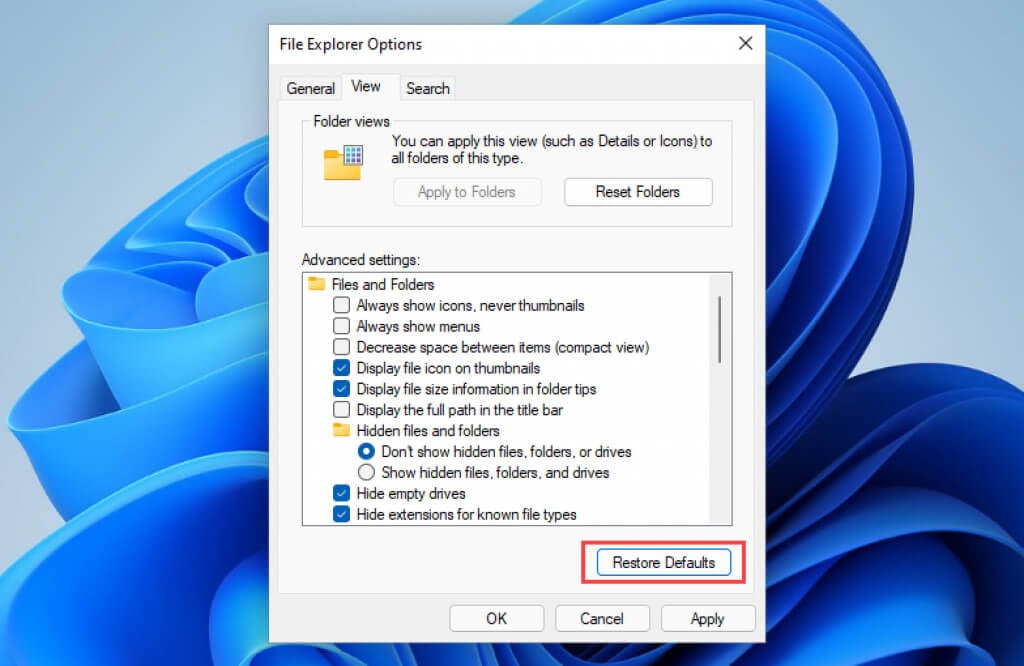
Restarting File Explorer’s View options to their defaults might also fix issues preventing Windows 11 and 10 from displaying thumbnails correctly.
- Search for and open the File Explorer Options dialog.
- Switch to the View tab.
- Select Restore Defaults.
- Select Apply, then OK.
Revert Default Application
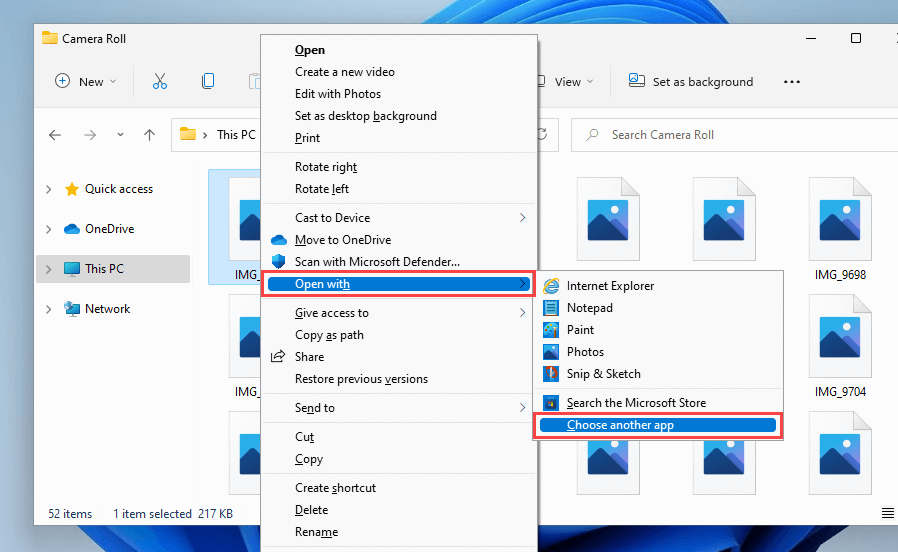
Is the issue limited to a specific image or video format? Setting up a different default program may cause that. Try configuring it to open in a native Microsoft app.
- Right-click any file in the file format and point to Open with.
- Select Choose another app.
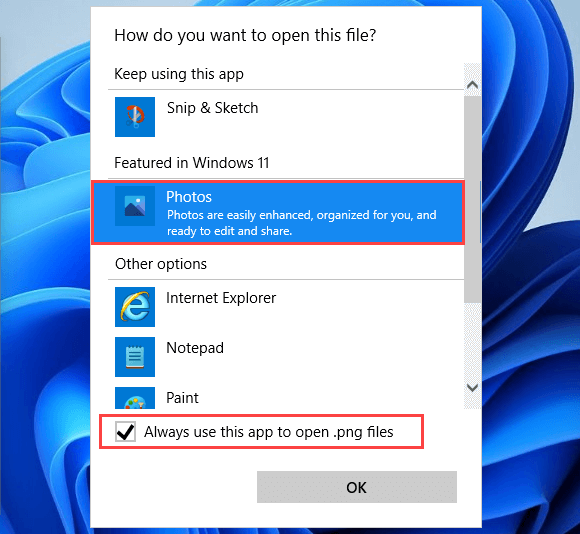
- Pick a native app– e.g., Photos (for images) or Movies & TV (for videos).
- Check the box next to Always use this app to open files.
- Select OK.
Install the Relevant Codecs
Conversely, image and video files related to non-supported formats in Windows may not display thumbnail previews. You can attempt to fix that by installing the relevant codecs. For example, the iPhone’s default HEIC image format won’t render thumbnails on Windows unless you install HEIC Image Extensions. On the other hand, the K-Lite Codec Pack can help you with uncommon video formats.
Update the Graphics Drivers
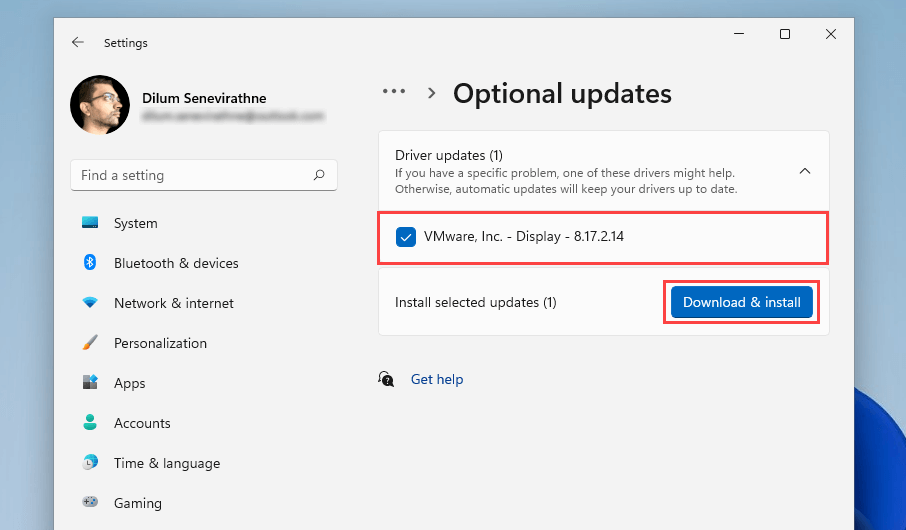
Outdated graphics drivers cause performance issues and prevent various Windows features (such as thumbnail previews) from working correctly. Check with the video card manufacturer’s website (such as NVIDIA or AMD) for a newer driver version or use a free driver updater tool to get everything up-to-date. Additionally, it’s a great idea to check Windows Update for any Microsoft-verified display driver updates.
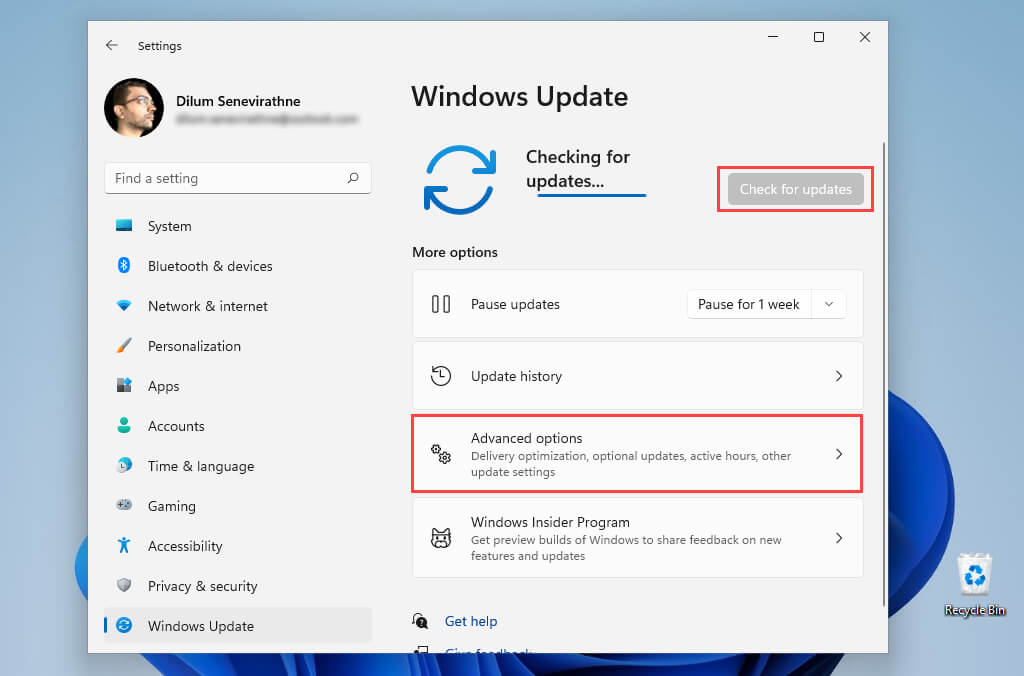
- Open the Settings app.
- Select Windows Update.
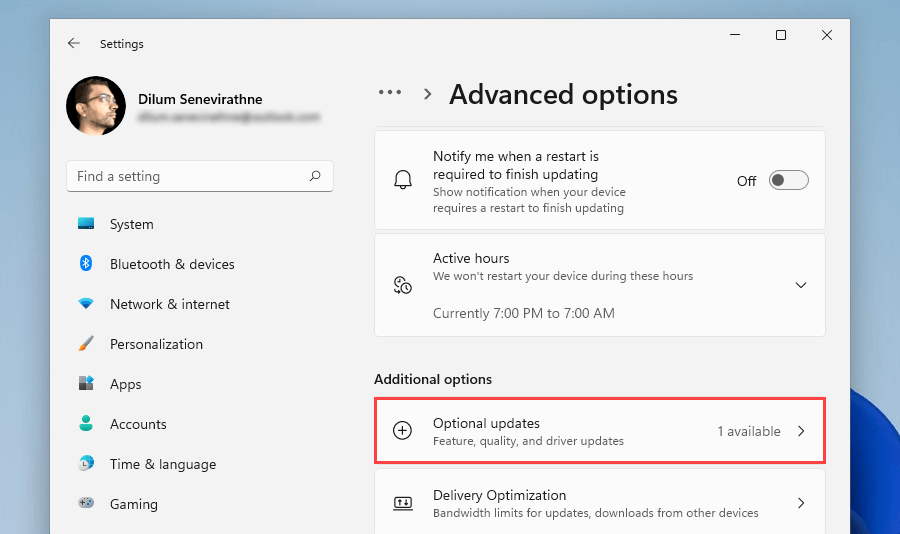
- Select Check for updates. After Windows Update finishes scanning for updates, select Advanced Options. On Windows 10, select View optional updates instead and skip the next step.
- Select Optional updates.
- Pick any display-related driver updates and select Download & install. While you’re at it, we also recommend applying the latest updates for Windows itself. They usually contain bug fixes for system-related features and just might help patch issues with File Explorer for good.
Run an SFC Scan
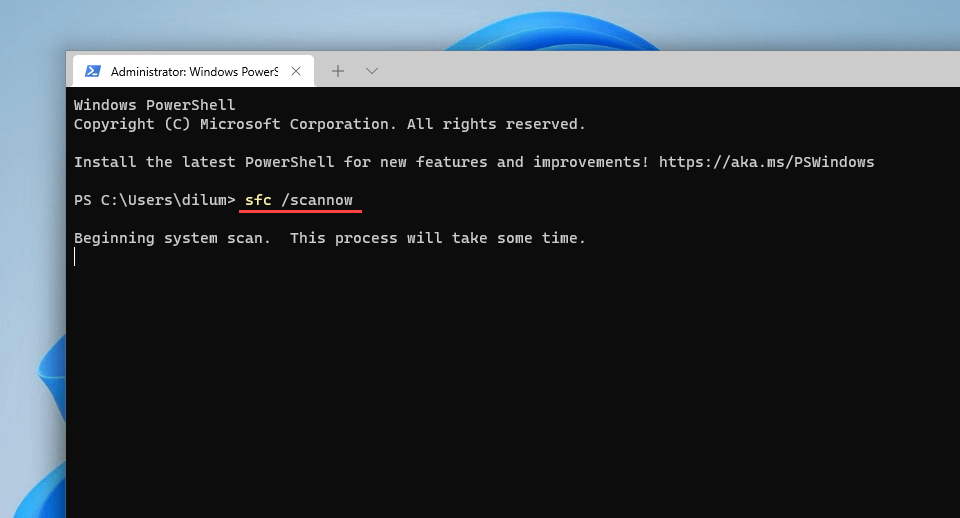
Try running a scan using the System File Checker. It’s a command-line tool that helps resolve possible file corruption issues in Windows 11 and 10.
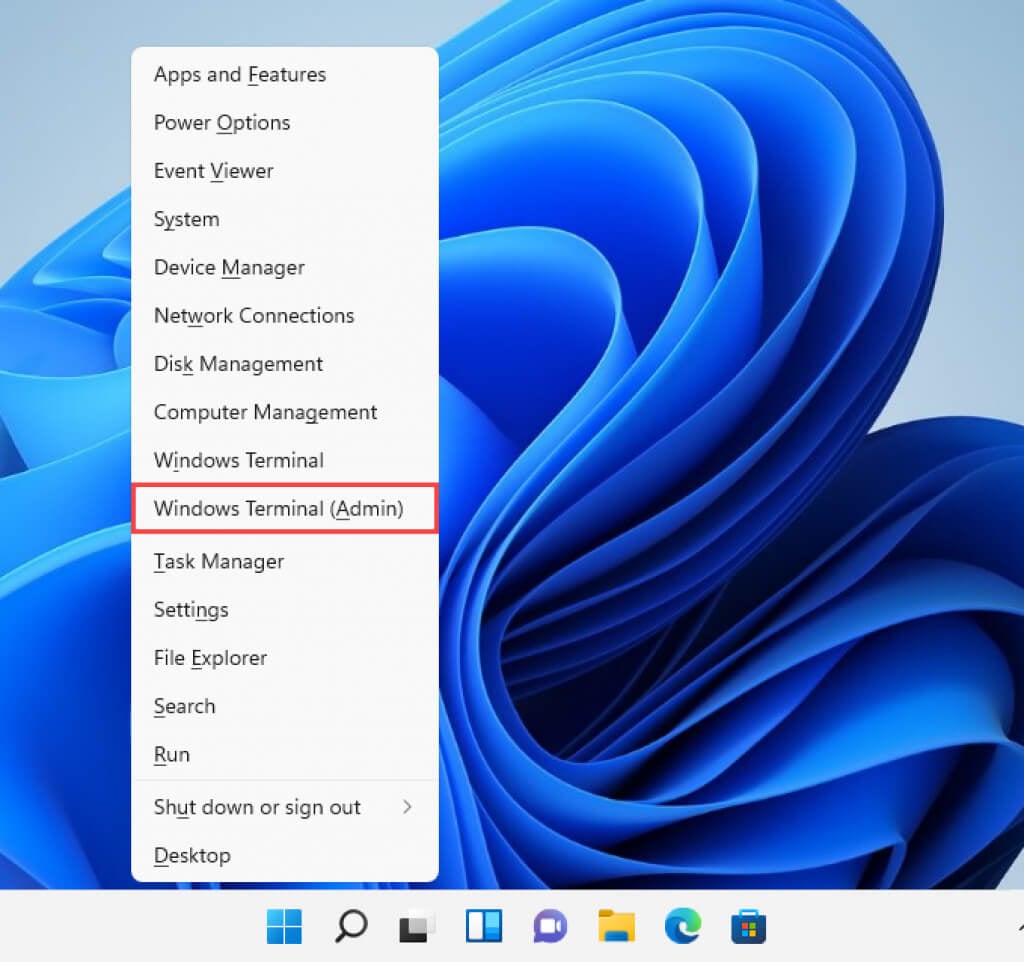
- Press Windows + X and select Windows Terminal (Admin) or Windows PowerShell (Terminal).
- Type the following command: sfc /scannow
- Press Enter. An SFC scan typically takes a while to complete. If it manages to find and fix issues, you might want to continue by running the DISM (Deployment Image Servicing and Management) tool.
Run Anti-Malware Scan
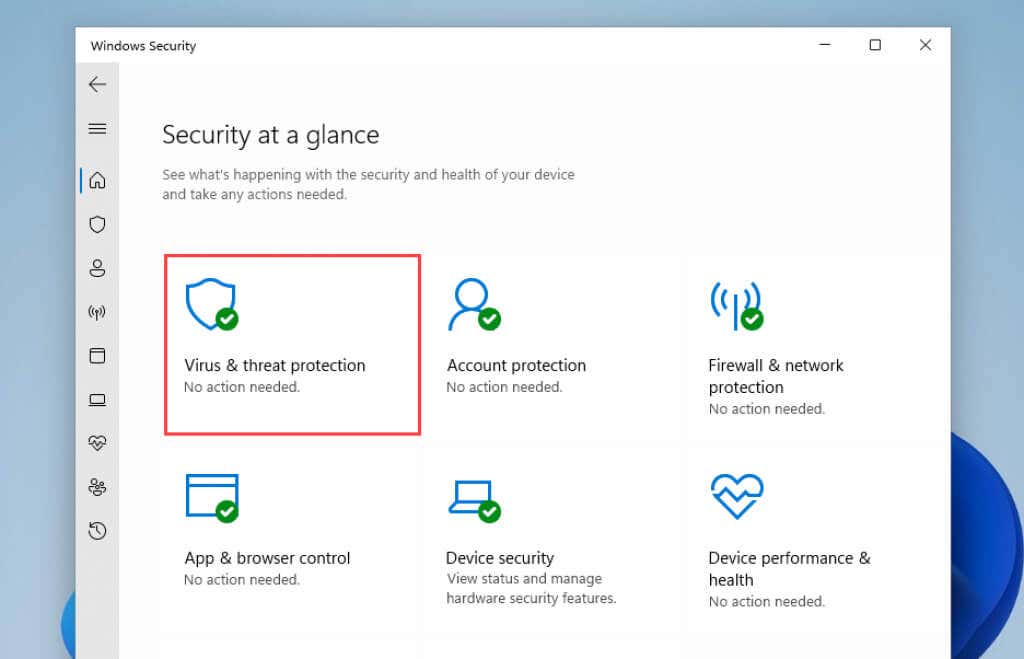
If the issue with non-displaying thumbnails continues or recurs, you might be dealing with File Explorer-hijacking software. Use Windows Security to perform a thorough scan of your computer for malware.
- Search for and open Windows Security.
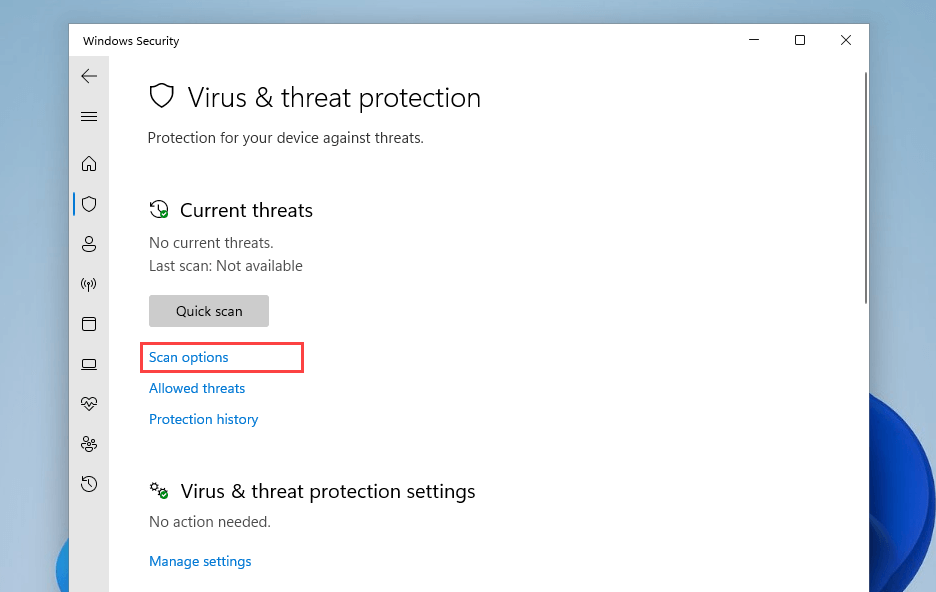
- Select Virus & threat protection.
- Scroll down to the Virus & threat protection settings section and install any pending antimalware definition updates. Then, scroll back up and select Scan options.
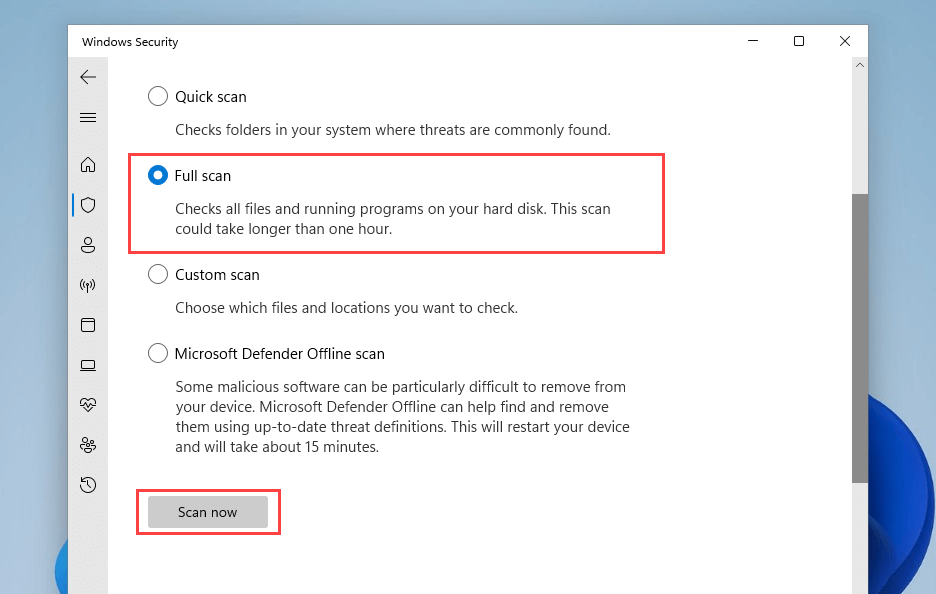
- Check the radio button next to Full scan.
- Select Scan now. Alternatively, you can use a dedicated malware remover such as Malwarebytes to find and remove dangerous forms of malware.
File Explorer Displaying Thumbnail Previews Again
If you work with images and videos, then thumbnail previews are indispensable. Hopefully, the solutions above helped, and File Explorer is back to displaying them correctly. It’s an essential feature that’s well worth taking the time to fix. If the issue recurs (and it very well might), just run through the fixes above, and you should be fine.
