However, SSD’s being an electronic device, are susceptible to faults and come with a list of issues of their own. If you’ve encountered an error where the SSD is not showing in the Disk Management, the most common reasons may include damaged parts, incompatibility issues and device driver problems.
How to Fix SSD not Showing in Disk Management?
Here, we’ll be looking at the various solutions by which you can fix the SSD not being detected or showing in the Windows Disk Management. After making sure that the issue is not related to the hardware, we’ll be looking at the software side. Here, we’ll try solutions that aim to detect the SSD and repair/reinstall their software components.
Check if the SSD is mounted correctly on the expansion slotCheck for damaged connectors, ports and cablesCheck if the port you are connecting to supports the interface of the SSDCheck if the motherboard supports the type of SSD you are installingCheck if the SSD functions properly by connecting it to another device
If you have confirmed that the SSD is a DOA (dead-on-arrival) product, you may need to exchange or RMA (Return Merchandise Authorisation) for a working one.
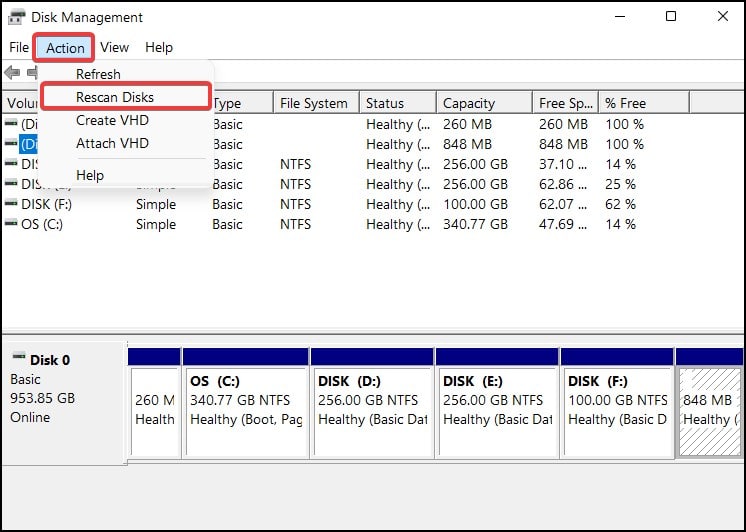
Rescan Disks
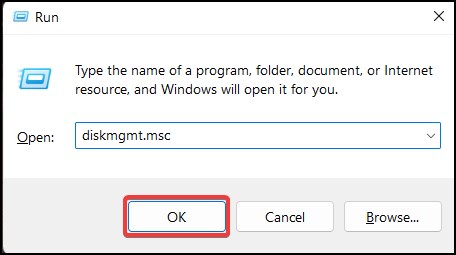
Sometimes when making changes in the hardware, like adding a new SSD to your device, the Disk Management may fail to detect and show the device. In such cases, firstly you will need to rescan for the disks from the Disk Management. To do this
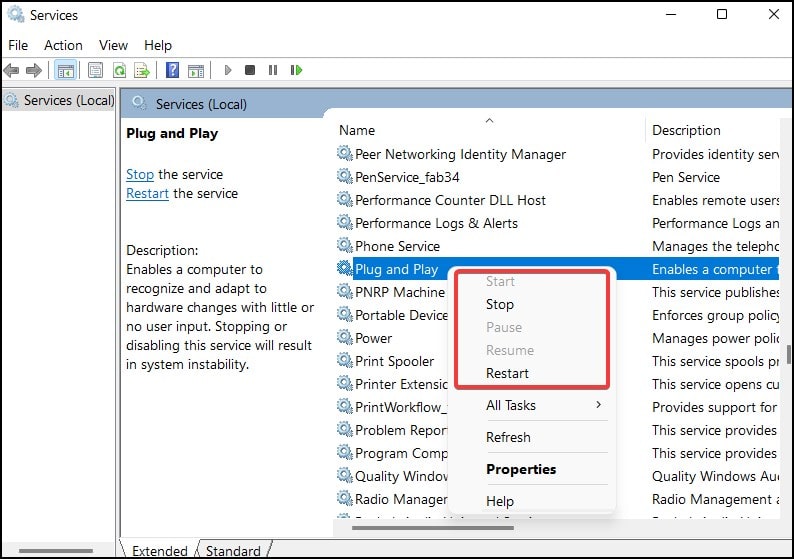
Restart Windows Services
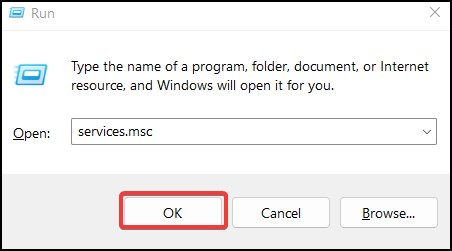
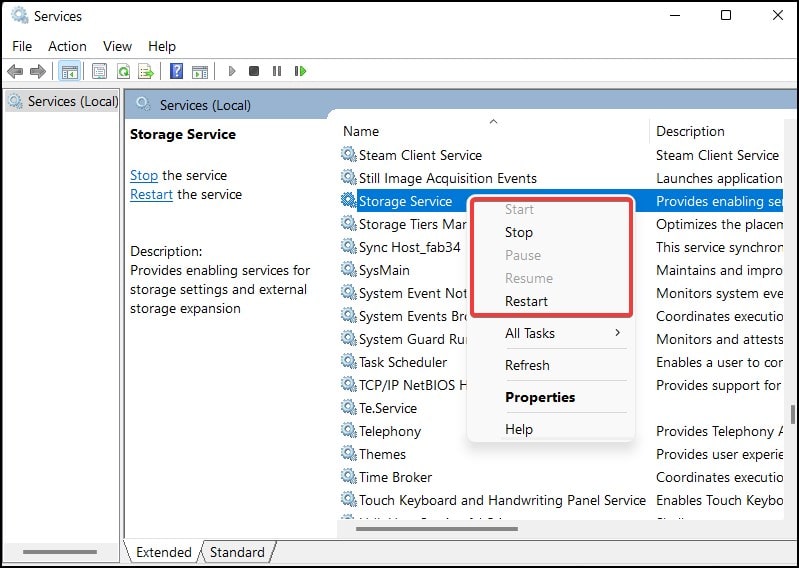
The Storage Service and the Plug and Play service allows Windows to automatically find, integrate and expand hardware on your laptop or desktop PC. If you have stopped or disabled these services, a newly installed or an external SSD might not be detected by Disk Management. To enable the following services
Change SATA Mode
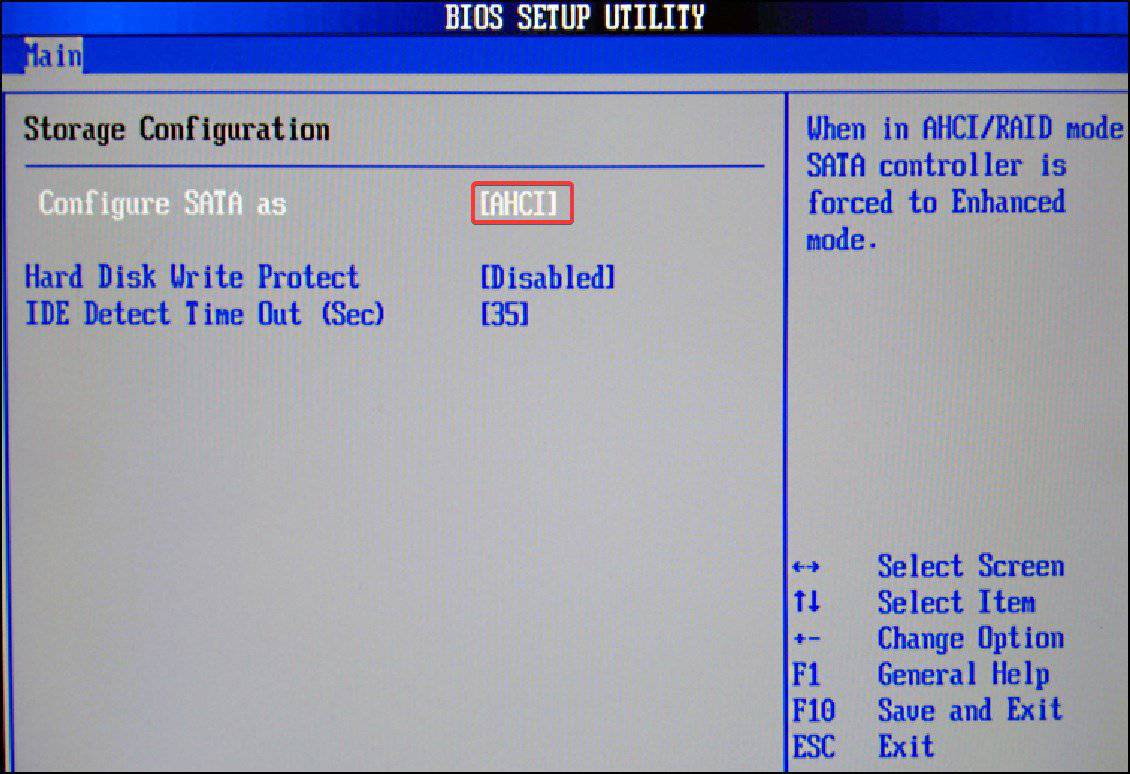
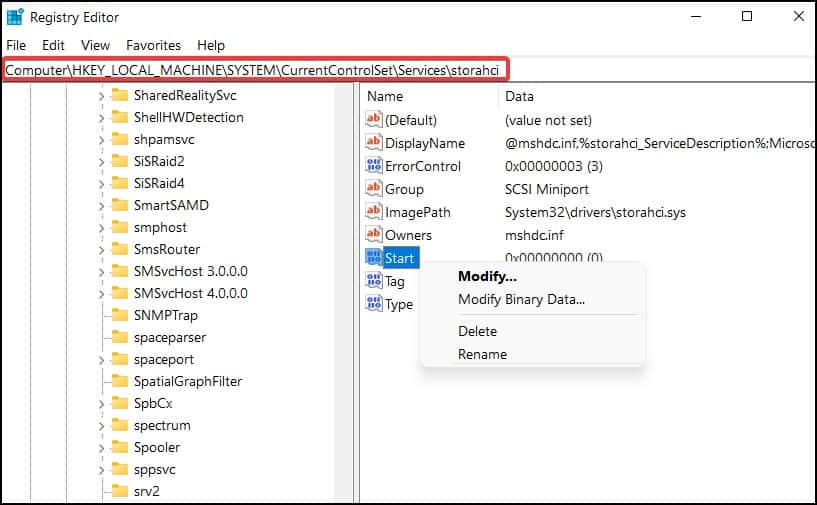
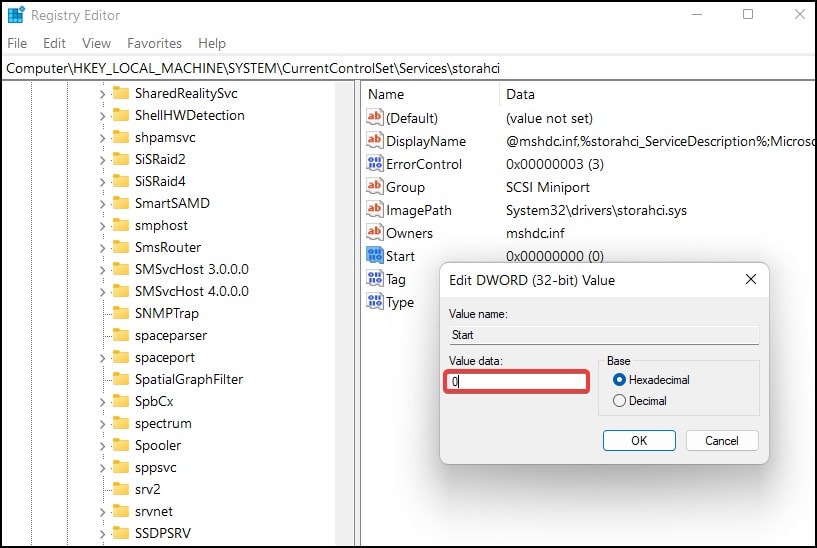
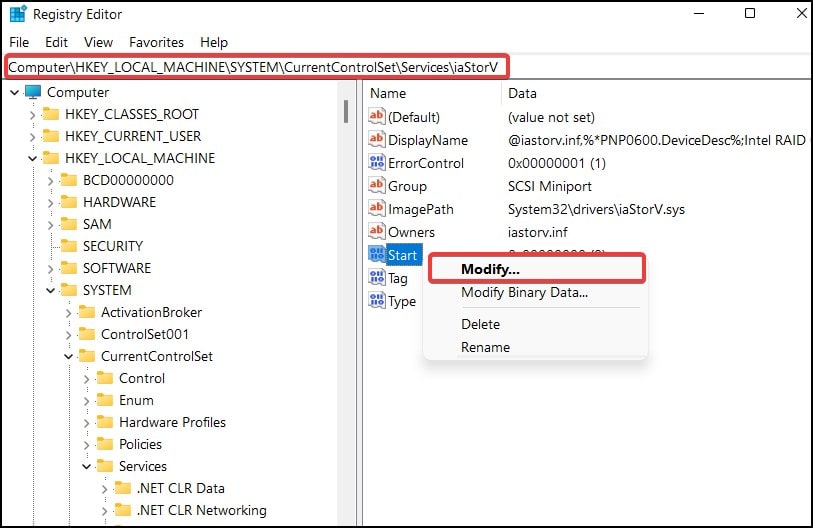
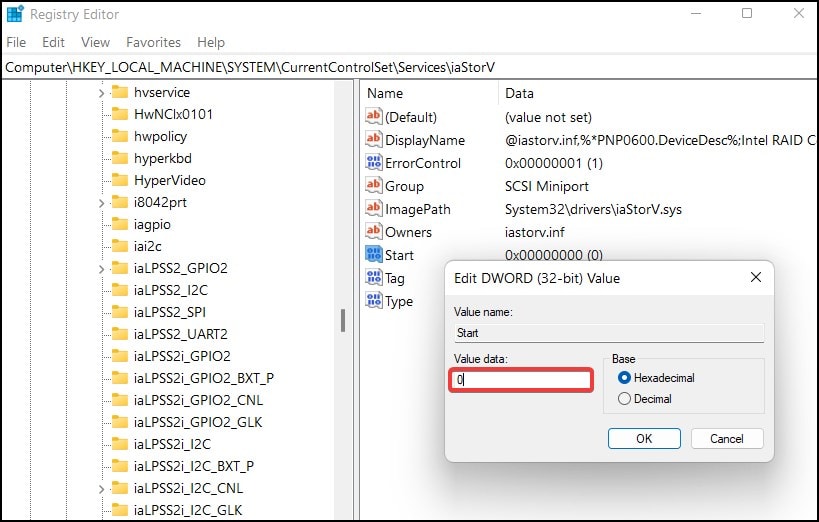
SATA controllers allow the disk drive that contains Windows to communicate with the system. Another fix for the SSD not showing up in Disk Management is to change and cycle the SATA controllers from IDE to AHCI or vice versa. To change the SATA mode in your device: If changing the SATA controller mode causes a BSOD in your device, boot back to the BIOS and revert the changes and select the other option until your device boots to Windows. Check Disk Management every time you change the controller mode to see if the problem is fixed. Another method to fix the crashing issue after changing the SATA Controller mode is to change the AHCI driver value from the registry. You can also perform this step before attempting to change the SATA Controllers in the BIOS. To do this Now, again boot into the BIOS and change the SATA controllers to AHCI. Your device should no longer show the Blue screen error when you try to boot into Windows.
Run Disk Partition Utility
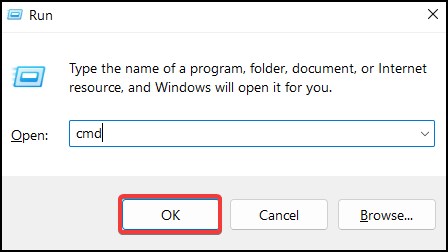
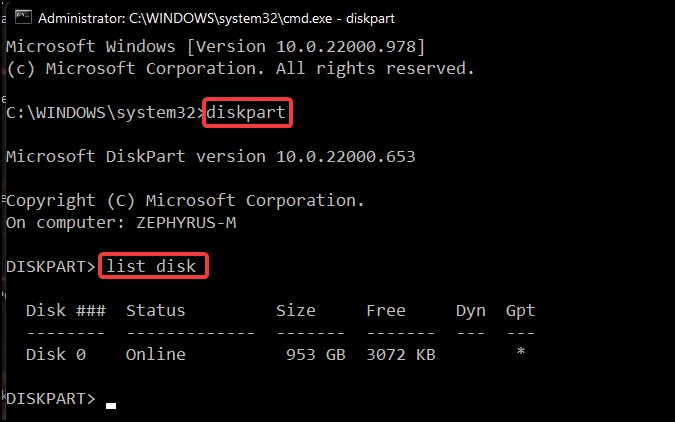
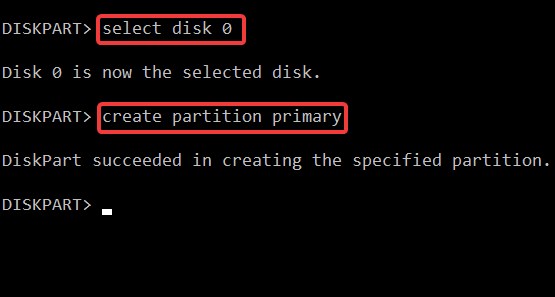
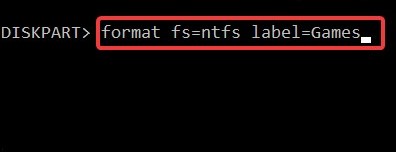
The next process is to run the disk partition utility from the command prompt and see if it detects the SSD installed in your device. If the disk is showing in the command prompt, you will need to format it from there to make it visible in the Disk Management. To run the disk partition from command prompt
Delete Storage Pools
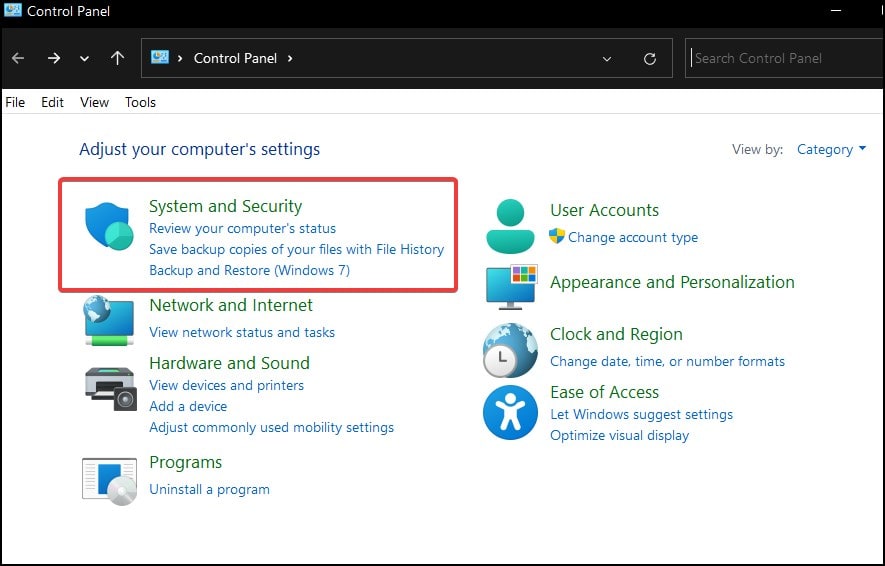
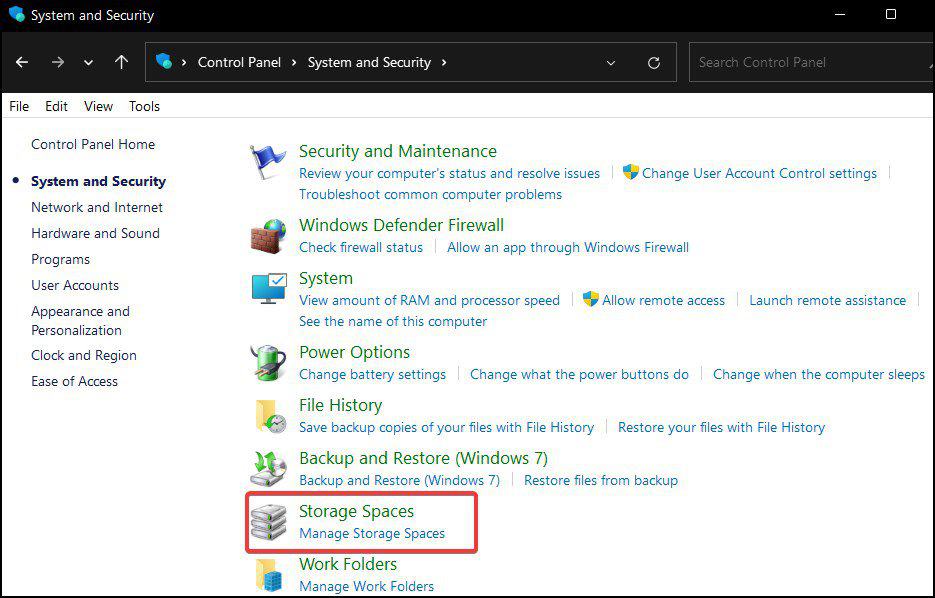
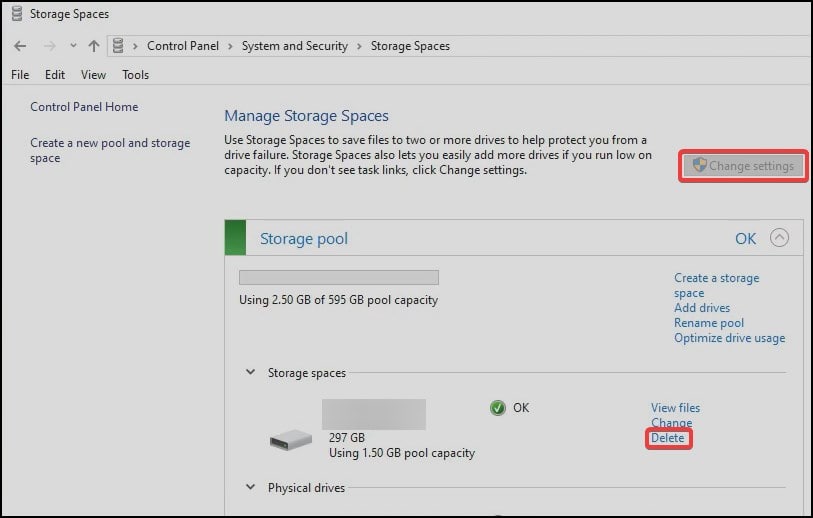
Storage pools are a feature in Windows that allows users to combine two or more disks into a pool to minimize data loss by hardware failure. Sometimes Windows automatically combines the SSD into a pool before initializing and allocating the disk, making your SSD undetectable by the Disk Management. To fix this issue
Reinstall Device Drivers
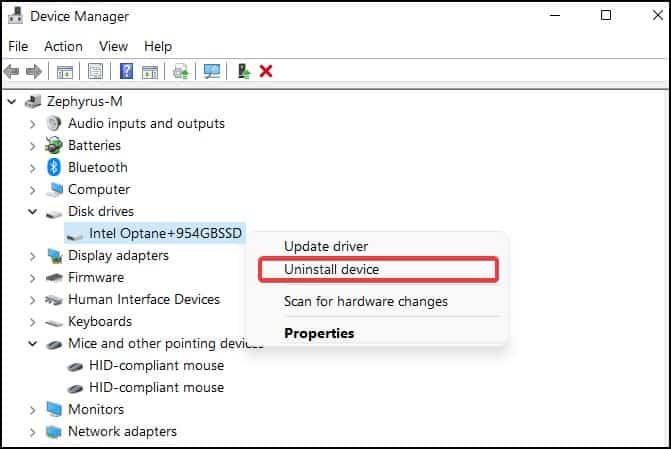
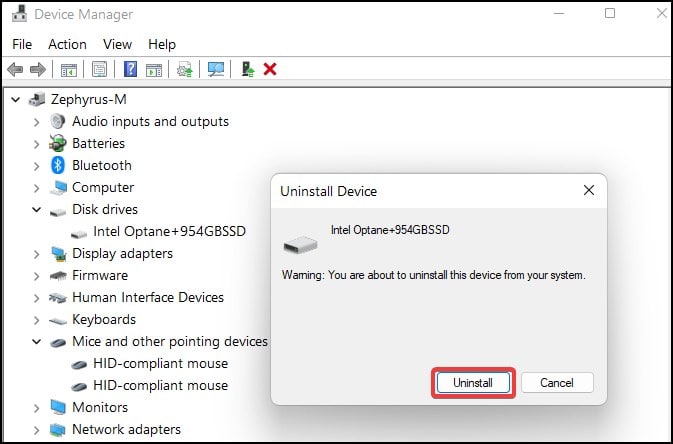
If the problem persists, then the problem may be because the SSD drivers have become corrupted. To fix this, reinstalling the device drivers may help solve the issue. Restart your device and check if the SSD is now showing in Disk Management
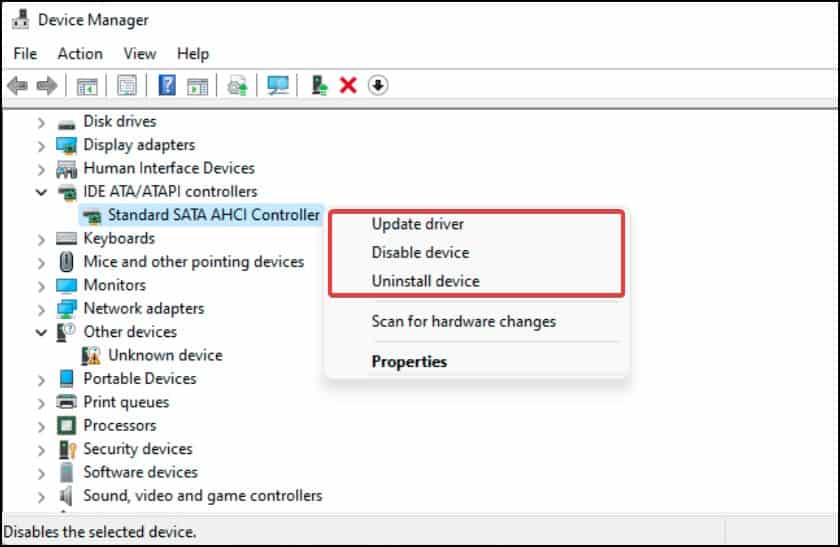
Uninstall the Standard SATA AHCI Controller
If uninstalling the disk drivers did not resolve the issue, then the problem may be because of the SATA AHCI controller of your device. SATA AHCI controllers help users control their AHCI storage device and establish communication with the OS.
